
We built ourselves a walk-in Cooler
- lindenlaneflowerfa
- Sep 24, 2025
- 3 min read
Updated: Oct 28, 2025
Mid-summer, I woke up to a flower farmer's nightmare! Our cooler had stopped working in the night and the flowers were overheating and quickly wilting. I checked to see if the breaker had tripped, causing it to turn off unexpectedly. I found that it had tripped, but when I turned it on again, flames shot from the cooler motor! The bottom of the cooler had started spewing fire! That is definitely what you call BROKEN.
This was a major problem for us. We were down our largest cooler and had orders to fulfill within days. We needed a solution fast, and thankfully, my incredible husband was prepared with an idea. We had long been thinking about building a full cold room somewhere on the property, but had been imagining building it as a freestanding shed. This new idea was to construct a new cold room in the corner of our shop, greatly speeding the process by using two already insulated walls.
I would never be one to turn down a flower farm upgrade, so we decided to start right away! The first step was, unfortunately, cleaning. The corner we planned to use for our project had two counters, a cupboard, and our large (possibly too large) collection of vases.


Above is the before and after view of the process of removing the hardware from our chosen corner. It was a lot of work, but it looked so clean in the end!
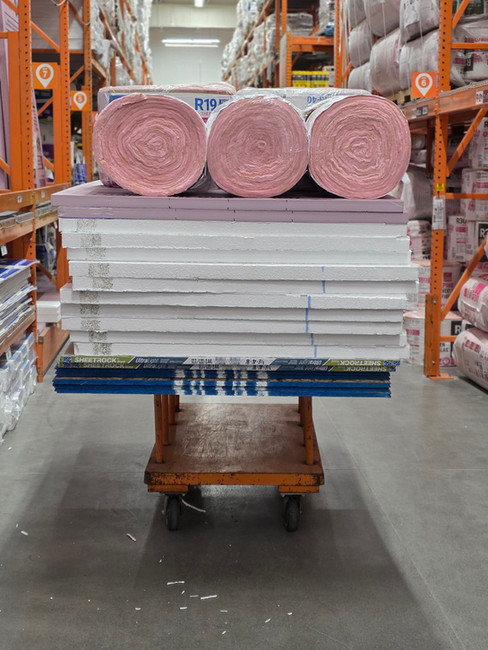
The next step was buying supplies. We needed boards to build walls, insulation, and sheetrock to cover the bare insulation. Several Home Depot trips later, we were stocked up!


We began building with the framing process. After mapping out the location for the cooler, we realized that with the shop's high ceiling, it would be possible to use the newly built roof for storage area. This was a relief, as we were quickly running out of space for everything removed from the shelves earlier!


After framing, it was time for outer sheetrock, then, finally, insulation! The room needed to be heavily insulated, so the frames were built with 2x6's rather than 2x4's. Heavy insulation to fit that 6" space was cut and stapled into place. Then the outer sheetrock was hung on the exterior and foam board insulation on the inside.


The final touches were some layers of shelving on the inside to maximize this cooler space! Two rows of shelves plus floor space is room for so many flowers!

Our cooling system was the well-acclaimed Cool-Bot system connected to a window AC unit, and it has been working flawlessly. :)
Despite the initial scare of the flaming cooler, we were able to have cold storage for our flowers within a week and a half! This was completed just in time for our largest wedding of the season where we needed to keep 51 arrangements cool and fresh!
One of the core beliefs of Linden Lane Flower Farm is turning the lows in life into exciting and interesting heights! In the end, it was a blessing that we were forced into solving the problem--no more band-aid fixes, but true solutions!
When have you taken a bad situation and used it as an opportunity to bloom?
Best,
Jaime


Comments